Showing posts with label DIY. Show all posts

Wednesday, March 02, 2016

Spring Wreath Refresh


While I was making my mossy monogram letter a couple days ago, I decided that I would use the rest of the moss to refresh a wreath that I already had on hand. 


I love this moss wreath (that I actually bought from a friend), but the moss had faded and it was kind of just blah. It no longer was a vibrant green, more of just muted green. But for Spring, I really wanted vibrant so I decided to add the new moss to it to give it new life. 


This bag of moss came from TJ Maxx for only $3.99. I was able to do this project as well as the monogram letter and still had some left over for future projects. And once again, this was very simple and quick; just hot glue and around ten minutes to make this wreath sing again. 


For not a lot of money or time, I was able to refresh this wreath for a vibrant spring entry item! It makes me so excited that Spring is on its way! 

Also check out:

Wooden Spring Moss Monogram Letter 

Tuesday, March 01, 2016

Wooden Spring Moss Monogram Letter


It's March first and Spring decorating is in full swing at my house. I've brought out the pastel pinks and all the green stuff I can find. If it's not quite green outside yet, I'll bring green to the inside! 

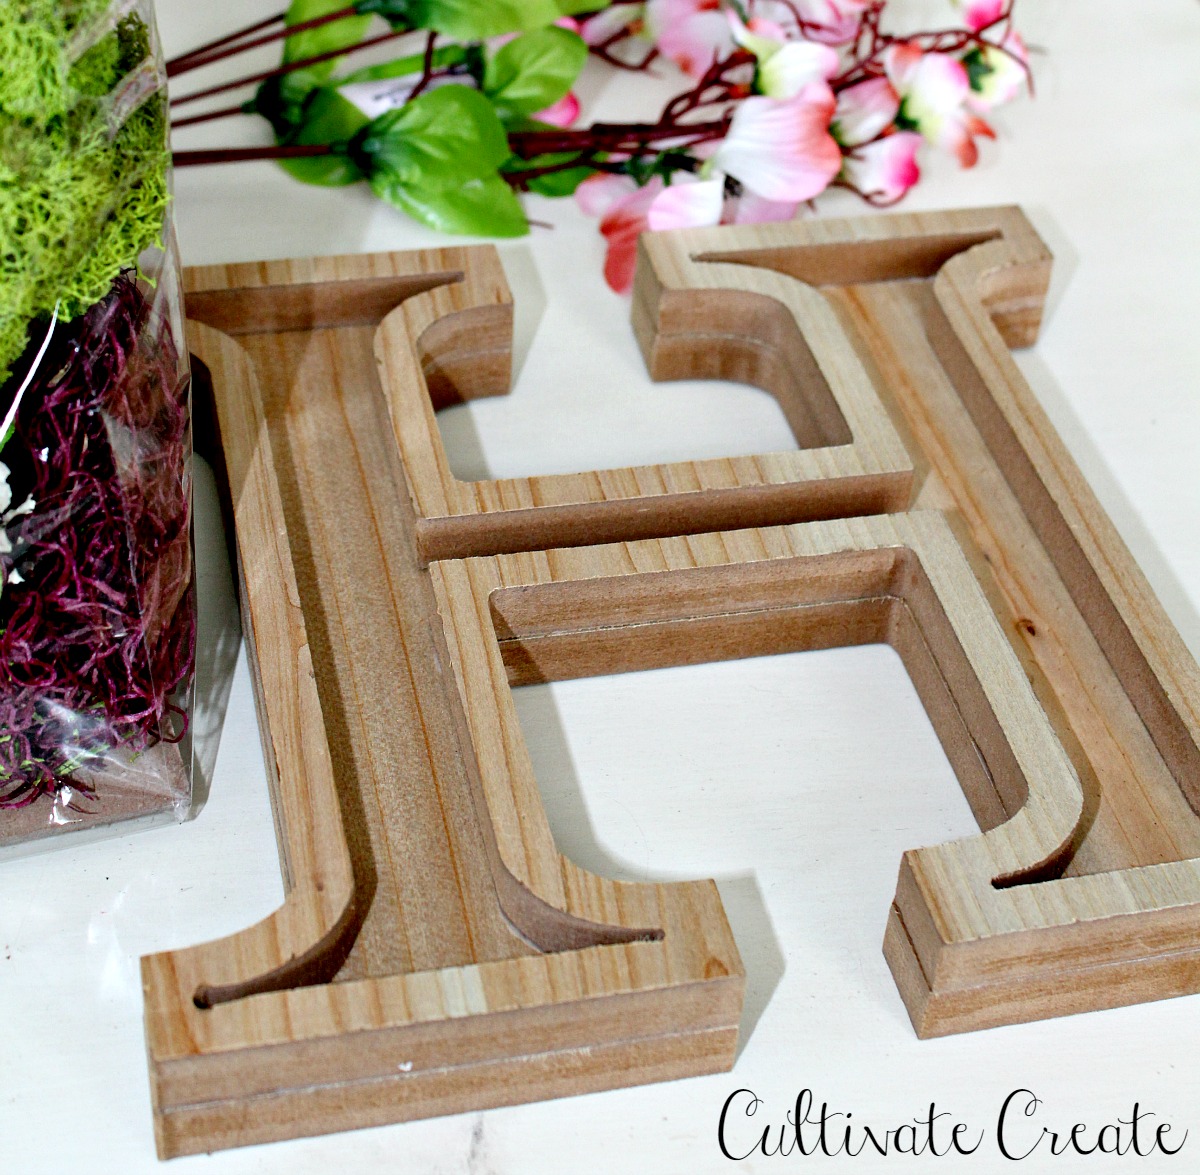
I'm not sure where I saw this project, but I'm thinking it was on Instagram. I'm not sure who posted it or even if it was exactly like this, I just have a notion that I saw a photo of a project similar to this, so I can't take full credit. Then, I went to Micheal's and saw this hollowed out wooden letter and I knew I had to create a pretty Spring monogram full of moss!


Like I said, the letter came from Micheal's for around $5 when I purchased it when it was half off. The bag of beautiful, assorted moss was $3.99 from TJ Maxx, and the stem of pink flowers was only $1 from the Dollar Tree. So, for only around $10, I've got a beautiful new Spring decor item (with some of the moss and flowers left over for another project.)


 All I had to do was hot glue the moss and flowers in place and I was done. It took less than ten minutes!


At this point in the year, I'm definitely ready for Spring and this project helped me jump start my Spring decorating and it makes me so happy to look that pretty, vibrant green and pink! Have you started Spring decorating yet?


Linking up to:

Tuesday, January 05, 2016

Top 10 Posts of 2015

Hello, friends! I can't believe 2016 is here already! I'm so looking forward to what 2016 holds, not only personally, but with Cultivate Create as well. To wrap up 2015, I thought I'd share the top ten posts of the year! If you missed any of them, go take a look. I'd love to know what you think. Leave me a message and let's connect! 


Gray Living Space


I Do BBQ Couples Shower

DIY Entry Organization Shelf

My Faves Party

Crutchfield Home Tour


DIY Fringe Party Backdrop


Halloween Party

DIY Patriotic Rag Wreath


Antique Dough Bowl Succulent Planter


Ladder Advent Calendar with Free Printable
Thanks so much for stopping by! Don't miss a post...you can join this site or the mailing list on the right sidebar, or follow along on Facebook or Instagram. 

Tuesday, December 01, 2015

Dare to DIY: Flocked Christmas Tree


An Honest Review and Tutorial. DIY if you dare.
I've been eyeing pretty flocked trees for a while. I'm so drawn to the snowy branches. It seems to bring some softness to the tree and I guess you always want what you can't have.... and for us, that's a white Christmas. It just doesn't happen in South Alabama. (My Iowa family members are probably thinking I should be careful what I wish for.) Anyway, I have perfectly good trees and didn't want to go buy another one, so I decided to DIY it. 

Now, I'm not one to shy away from a good do-it-yourself project. But, when I started researching how to flock a Christmas tree, I almost decided to forego the whole project. But I really, really, really wanted a flocked tree and I had a vision in my head of how I wanted my tree to look this year and when I get a vision in my head, it's virtually impossible for me to veer from that direction. (Was that enough of a run-on sentence for you?) So, I decided on the most cost-effective way to flock a tree. Apparently this method was the way many people flocked trees decades ago. It involves soap flakes. 

I should let that sink in for a minute for you. Soap flakes. I should've known right then and there that this project may not go the way I envisioned it, but I forged ahead anyway. In case you're like me and desperately want to DIY your own tree, here's the recipe I used for my flocking.

Tree Flocking:
*1 large box soap flakes (all I could find was Zote soap flakes at Wal-Mart. It comes in a 17.6 oz. box for $2.64)
*4 tablespoons of corn starch
*3 cups of cold water
*1 cup of hot water
*vanilla and cinnamon (if you want to add for scent)


My tree before flocking (unfluffed)


How-to:
Add your box of soap flakes to a large bowl, then mix in the three cups of water. Add your cornstarch to the cup of warm water and stir. Then add that to your bowl and mix with a mixer until fluffy. (You may have to microwave your soap mixture to soften and melt the soap flakes. I ended up having to do that a couple of times.) You want to mix until your consistency is like fluffy shaving cream like the picture above. You can add the vanilla and cinnamon if you want to for scent. This has a very strong soapy scent, obviously, and I read somewhere that adding this helps cut down that scent. In my experience with it, it really didn't make much of a difference.  


Then, all you have to do is apply directly to your tree. I put my tree in my garage on top of a drop cloth. I didn't use gloves, but if you have sensitive skin, you might want to wear some. 


I applied the thickest amount on the very tips of the branches and a little lighter further in the tree. Once you are finished, let the tree sit for at least twenty-four hours to cure. It will dry hard.


I really liked the look of my tree when I was finished. It was flocked, but not overly so. I was so happy with and I couldn't wait to get it inside. 

After it cured overnight, I enlisted my husband to help me carry it inside still fully put together to keep from messing up the flocking. Here's where the Griswold moment comes in. I could tell by touching the flocking that it would break off easily, so I thought the best way to keep it mostly in tact was to just carry the whole thing inside fully put together. This involved us opening up both French doors at our side entry to fit it inside. Instead of taking an immediate left to get the tree to its home, we had to walk through the kitchen, through the dining room, then to the foyer, and finally the living room to get it to the office where it was going. Everywhere we walked through had a trail that looked like this:


Sorry about the blurry cell phone photo, but that was all I snapped of this mess. Ya'll, it was everywhere! I swept at least three times and vacuumed to get it all up. We probably lost 35-40% of the flocking just getting it inside and I probably lost another 10% when I decorated it.  That's about half of that pretty flocking that I spent so much time hand applying just gone!

So the moral of the story is sometimes you win at DIY and sometimes you lose. As it pertains to this particular project, I was definitely on the losing end. I'm not sure how it went for all of the many other bloggers whose posts I read about how to flock a Christmas tree, but the most anyone mentioned was that it was "messy." That may be a bit of an understatement. It is VERY messy, a good bit of your flocking will probably break off, and it smells overwhelmingly of soap. That has faded as the days have passed, but the first few days it had a very strong soap odor. 

On the up side, I still have some pretty, soapy flocking still in tact on my tree that I can enjoy for now. But, we'll see how long it takes for that to break off as well. Oh well. All's fair in love and DIY flocked Christmas trees. 

Monday, November 09, 2015

DIY Thanksgiving Wheat Bundle

Okay, I'm not gonna lie. My brain has totally already switched over to Christmas decorating mode. But don't worry...I haven't actually decorated for Christmas yet, but I may or may not have already (1) Listened to Christmas music, (2) Watched sappy Christmas movies on the Hallmark Channel, (3) Wrapped some Christmas presents, (4) Put Christmas pillows on my couch. 

Well, yeah, okay. Maybe I'm getting a little carried away a little too early, but I just can't help myself. I blame in on Instagram (all of the bloggers I follow are posting Christmas decor pics like it's December first), and I blame it on Starbucks Peppermint Mocha lattes, and I blame it on the Hallmark Channel. 

I won't actually be hosting Thanksgiving at my house this year, so I feel a sort of freedom to slowly begin to bring Christmas in at my own pace, letting my creative juices flow! I do usually decorate a little early so that I can share projects and inspiration here on the blog for all my bloggy friends out there. But, I won't be posting Christmas projects quite yet. But Christmas (winter) is coming and be prepared for those posts very soon. For now, though, here's a simple tutorial on how to make your own wheat bundle. These would be so gorgeous on a Thanksgiving table. 

DIY Wheat Bundle

What you'll need:
~Wheat 
~Twine or floral wire
~Decorative ribbon
~Scissors


Start by gathering your wheat, then twist in the center to spread it out. You want to end up with a flat base so that it can stand on its own. If needed, trim to make level.

Next, once you get the desired shape, secure with wire or twine. Then, embellish with ribbon. And that's it! You have a beautiful centerpiece for your Thanksgiving table!


Thanks so much for stopping by! I hope you'll come back! Check the Cultivate Create Facebook page later today....I'll be announcing the winner of our Favorite Things Blogiversary giveaway winner! 

Monday, October 19, 2015

Sheet Music Embellished Grapevine Wreath


Hello, friends! I'm finally back today with a tutorial that I'd planned on sharing last week. Our internet was on the fritz and we had to get a replacement modem and router from our internet provider. It took longer for us to get it than we thought, but at least now we have a stable connection. And, yes, I'll admit it, I didn't have the motivation to go the library or somewhere with free internet to post. Sorry, guys.

In addition to little things like not having internet, I've just felt really off balance lately. I can't seem to get my ducks in a row, you know? It just seems there have been so many things pulling me in different directions and I just get frozen in this immobile place. I know I haven't been posting as regularly here, and that's partly because of the whole feeling stuck thing, and partly because I think I just needed a little time to not feel like I had to post three to five times a week. I needed to cut myself a little slack. 

Sometimes my mom's cancer weighs heavily on my heart, although she is doing quite well right now. I lost my grandfather a month and a half ago, my other grandfather is in poor health, and over the weekend my grandmother (whose husband just passed) was hospitalized for stroke and aneurysm. Anyway, I know I can rely on God for all things, and I do have a peace, but it still makes me really sad sometimes. 

With that being said, something that really makes me come alive is being able to sit down and create something with my hands, to make something pretty to share with you, and to show you how you can make your own if you want. Even though I haven't posted all of my fall projects, I have them done. Today's tutorial is just a simple project that's a small part of the whole fall decor in my home. Check back tomorrow for my fall home tour. (Yes, about a month after I should've shared it.....sigh.....oh well.)


I really love wood tones and aged things for fall decor. I have lots of vintage sheet music, so I decided to make an embellished grapevine wreath to add texture and interest my fall decor in my dining room. To make your own, here's what you'll need:

*8 inch grapevine wreaths. (I ordered a pack of six on Amazon).
*Vintage sheet music or book pages
*A hot glue gun
*Ribbon


Start by folding your paper accordion style. 


Then, cut your paper into thirds. Your sections of folded paper should only be around four inches long. 


Using your hot glue gun, start adhering the paper folds to the grapevine wreath, making sure to not leave any gaps. You may have to glue between the paper folds as well. 


Then, hang with ribbon of your choice. I made small wreaths so I could hang multiples on this ladder (actually the side of an old crib that I found on the side of the road.....no apologies there.....I totally love it!)

That's all there is to it. SO easy to make. You could always make smaller or larger wreaths and adjust your paper size accordingly. How cute would a variation of this be for Christmas ornaments? They sell small, four inch wreaths that would be perfect for that. 


I can't tell you how cute this turned out! The photos just don't do the wreaths justice. Please stop back by tomorrow for my fall home tour and see how they coordinate with other elements in my fall decor. Thanks for reading!

Wednesday, September 09, 2015

Waverly Chalk Painted Dresser


A few weeks ago, my husband spotted this gem on a local Facebook buy/sell/trade page. He showed it to me, and I immediately jumped at getting this beautiful dresser. The price was right and it was exactly the style and size that I needed for my daughter's bedroom.


I'm not exactly sure how old this dresser is, but it was in pretty good condition apart from the sanded top and the dated color......a dingy cream with brownish-gold trim. I knew that it'd be an easy fix to make this dresser sing again.


I've used chalk paint many times before to update furniture pieces, but had never used the Waverly brand. It's much more affordable than the Annie Sloan brand, but I wasn't sure that the quality would be the same. I decided to try it out. If I didn't like it, it's just a matter of repainting. I chose the colors Plaster for the body and Elephant for the trim. How can you go wrong with white and gray? (By the way, my go-to paint of choice for furniture is chalk or milk paint because it eliminates the need to sand or prime in the first place in most circumstances.)


However, when I got finished painting the gray trim, I wasn't crazy about it. It wasn't the shade of gray that I thought it would be....it dried much darker (and with a blue tint) than I expected. I ended up repainting the trim with Valspar Mountain Smoke that I already had on hand. 


Once I finished painting, I sealed it with a paste finishing wax. I use Minwax paste wax. It goes on with a hint of an orange tint, but it dries clear. I love that stuff. I've used it on many pieces and it always looks nice and gives a nice finish. When refinishing furniture, especially when using chalk paint or milk paint, DO NOT SKIP THIS STEP! It's very important to seal it to protect the paint and give it longevity. Milk paint has a flat finish and if left unsealed, it will easily stain or chip. If you're going to distress your piece, do it before you use your wax. When you apply the wax, it should keep it from further chipping. (I didn't distress this dresser.)


After I painted the gray trim, I took some gold metallic craft paint and gently rubbed it on. I wanted a slightly aged look with a little bit of shimmer. It worked out perfectly and I am in love with the result! It's so pretty how it catches the light. 


Overall, I would say that the Waverly paint worked just as well as some of its more expensive counterparts.  I didn't even use a whole container of paint for this project and it was a pretty small jar. You can purchase this paint at Wal-Mart, however the availability may vary by store and region. My local Wal-Mart used to carry it in the store, but now doesn't. I had to order mine from walmart.com. I was pleased with how this dresser turned out and will definitely use this paint again, even if I have to order in online. It was worth it. 

Have you ever used Waverly chalk paint before? What were your experiences with it? Do you have another chalk paint or milk paint that you love? I want to hear about it! Leave a comment below!


Linking up to:

Follow this blog with bloglovin

Follow on Bloglovin

LinkWithin

Related Posts Plugin for WordPress, Blogger...