Thursday, June 26, 2014

DIY Party Picks

As promised, I'm back today with a simple tutorial showing you how to make these adorable party picks.  They are so easy to make!


They stand ready to go in my portable party caddy, a simple embellishment that adds just the right amount of color for any party. 


What you'll need:
Scrapbook paper or vellum
Wooden Skewers
Invisible tape
Washi tape (optional)


Cut your paper into squares two or three inches wide. Then, cut "fringe" about three quarters down the square. 


Attach one side of your square with to to skewer. I shorten the skewers by breaking them so they won't be so long. Wrap the paper around and secure with tape. If you have washi tape, you can use that instead. (I used red and white polka dot washi tape with white paper.) 


Use these as drink embellishments......(don't forget the star shaped ice cubes.)


Use them for meats, cheeses, fruits, or olives. And just throwing this out there; how cute would these be made with brown paper for a Halloween or Harry Potter party? They would look like little brooms. (For the Fourth of July, they remind me of fireworks.)


There you have it. Easy peasy.


Wednesday, June 25, 2014

Party Caddy

About a year ago, I found this really awesome caddy at my local flea market. I am not sure how old it is or what it was originally used for, but I snatched it up knowing that I could use it for something


I added some jars and was ready to utilize it to its maximum potential.  For a while, it has housed art supplies. But I thought using it as a party caddy would serve me well for a backyard bbq and enable easy transport outside. 


I added straws, utensils, and food picks to the caddy for easy use. And it looks festive as well!


Come back tomorrow for a tutorial on how to make those adorable food picks! 

Linking up to:


Tuesday, June 24, 2014

Laundry Room Rescue

When we bought our current home two years ago, we inherited a dungeon of a laundry room.  It was dark, outdated, and had really weird shelves that weren't attached at the ceiling. 

Now, laundry is probably one of my least favorite chores. Combine that with having to go into the "dungeon" and I absolutely dread it sometimes. There is no natural light and there was blue indoor/outdoor carpet on the floor.


You know, when I walked in there sometimes, it kind of reminded me of Kevin on Home Alone when he walks into his basement. Yikes!


We removed all of those weird shelves....


Removed the blue carpet.....


This is what the floor looks like now. The carpet was glued to the concrete subfloor so now it is discolored with glue residue. It also looks like there was tile in this room at one time. We also had to remove some of the baseboards, which revealed a huge gap in the wall. Can't wait to get those boards back on. 


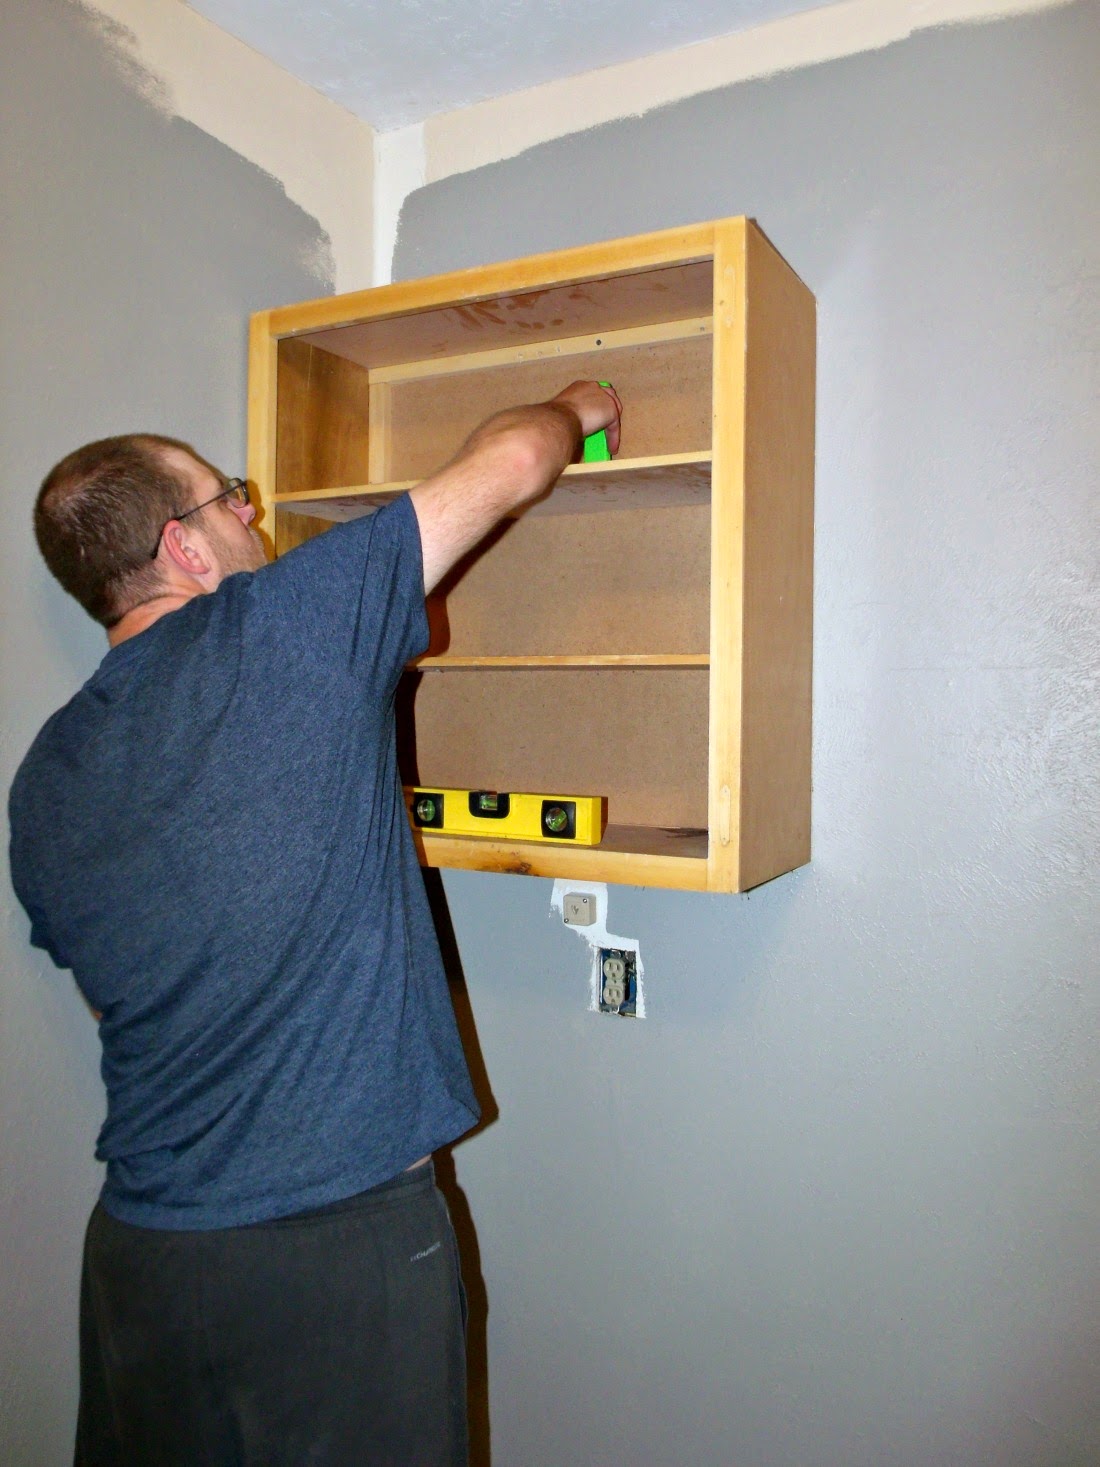
I did start painting this room, and while I do like this gray color, it is just too dark for this space since there is no natural light. Back to the drawing board on that. We had cabinets sitting in our garage that were taken out of our kitchen when we remodeled it and saved them for the laundry room. We also have enough cabinets to use in our office when we get around to it. So, hubby and I hung a section of uppers and added a base cabinet as well. We also had a leftover section of laminate countertop as well. It just needs to be cut to fit this base cabinet. 


Our half bath, which is right on the other side of the right hand wall currently houses the hot water heater. I have no idea why the previous owners decided to put a hot water heater in a bathroom, but now it has to be moved. It will go in the corner of the laundry room beside the cabinets according to the gentleman from the gas company. As much as I would rather not have it in the laundry room, I don't know where else it could go and I would rather it be there rather than the half bath. 


So the laundry room looks marginally better already. It still has a long way to go before we are finished, but I am excited that we have finally started working on this project! 

Here's our to-do list:
*tear out shelves
*rip out carpet
*Hang cabinets
*Paint cabinets
*Cut countertop to fit base
*Paint countertop (yes, I am going to paint it.)
*Tackle floors
*Add baseboards and quarter round
*Paint walls, trim, and ceiling
*Build pedestals for the washer and dryer
*Add shelf above washer and dryer
*New light fixture for more light
*Organize and make it pretty


Monday, June 23, 2014

Pillow Pizzazz

In moving forward with getting my back patio ready for the Fourth of July, I worked on a project that only took me about fifteen minutes to complete. I had a red pillow (that my mom gave me) and two oblong navy ones (that I got for $2.50 each at Old Time Pottery to use as inserts) that I wanted to use to add a little color to the patio. But they were just so plain and sad as they were. 


I could practically hear them begging for a makeover, for a little pizzazz. 


So, I obliged and had them spiffed up in no time.  I used a lid to stamp the polka dots on the navy pillows.  I did not add a fabric medium to the paint. I just used regular craft paint that I had on hand.  For the number four, I made my own stencil out of cardstock. 


I actually really like the imperfections. It gives the pillows character.........and a little pizzazz


This project was simple, took very little time, and didn't cost me a dime because I already had everything on hand.  Sometimes, small things can have a big impact!


Thursday, June 19, 2014

Vibrant Summer Patio

At this moment, my back patio is in sad shape.  It's messy and jumbled,  houses the lawn mower and a small four wheeler, and is just a hot mess. Mismatched pots, randomly placed tables and chairs, and toys just add to the hodge podge feel of it. 

With a Fourth of July Barbecue deadline approaching, I have been motivated to make it look presentable on a budget. I came up with a color scheme that will look great for the Fourth of July as well as year round. 

1.BM-Firefly//2.BM-Florida Keys Blue//3.BM-Hot Tamale//4.BM-Hale Navy//5.Yellow Rug//

Let's start with the color scheme. My front door is currently painted Florida Keys Blue.  At Easter, I added a monogram bunny with a yellow bow to the front door and I really like how the yellow popped from the turquoise blue.  When I planted flowers in my pots and window box, I planted red and it all looks really great together. It gave me the idea to use that color scheme for my back patio.  Adding the navy is great for the Fourth of July, but it also grounds the otherwise uber-vibrant color scheme. 

While it is not in the budget for me to go out and buy everything brand new or all that is on this design board, I can still achieve the look using what I currently have or DIYing new items.  I already have two of the white chairs from Ikea that I will use, as well as an assortment of throw pillows.  I plan on making a yellow rug similar to this one, and for pops of color, spray paint will be my best friend. 


Remember this ladder?  I used it as a plant stand last year. It has seen better days, for sure. I'm still going to use it as a plant stand and a fresh coat of spray paint will make it all better......in red!  


I have so many mismatched pots.  They are all getting a coat of paint for a more cohesive look. 


I have two of these shelves. My hubby made them for me out of pallet wood and they once housed books in my youngest daughter's room before we redid it. They were white and now they are a fresh red.  I think I'm going to hang them on the wall under my patio above a table to house extra condiments, paper goods, or whatever is needed for barbecues. 

I have been working hard this week to get all of this stuff painted.  So. Much. Spray paint! I think I have gone through three cans of red, and one blue, white, and yellow so far. But in the end, it is less expensive than buying all new things. Can't wait to share with you when I'm done! 

Have a stupendous weekend, my friends. 


Tuesday, June 17, 2014

Digital Design Board

I had an awesome time creating a Master Bedroom Design Board for Dana!  If you remember a couple of months ago, I did a Design Board giveaway, and Dana was our winner!  She said she wanted a Master Bedroom plan using blacks, blues, and grays.  I think the colors work so well together, and give off a sophisticated, elegant air. What do you think? 


Want to learn more about how you can get a Digital Design Board for a room in your home?  Email me at cultivatecreate@yahoo.com.  


Thursday, June 12, 2014

Independence Day Inspiration

I love the Fourth of July!  We get to celebrate our great nation and enjoy the company of good friends. We get to savor grilled hamburgers and hot dogs, let homemade ice cream cool us off in the hot July air, and write our names in the sky with sparklers! It makes me reminisce about all things America; baseball, apple pie, the sacrifice that so many men and women have made so that we can be free.  

Our Independence Day is less than a month away, and I'm dreaming up ways to decorate to help make it a special day. Currently my "brainstorm" is scattered all across my dining room table. 


Seeing all of the red, white, and blue makes me smile. The stars and stripes get me excited about decorating for that day. Sometimes, kind of heaping all of my items together help inspire me, almost like a living design board. 


Right now, our back patio is almost unusable, but I am looking forward to making it a relaxing space that my family can enjoy.  I'm going to be decking it out with red, white, and blue and I already have some projects in the works. I can't wait to share them with you as I get them finished starting next week and leading up to the big day.  

Have a great weekend and God bless America, land that I love. 


Follow this blog with bloglovin

Follow on Bloglovin

LinkWithin

Related Posts Plugin for WordPress, Blogger...