Showing posts with label Autumn. Show all posts

Monday, November 11, 2013

Little Pumpkin Baby Shower


This weekend, with the help of my sister-in-law Kayla,  I had the honor of hosting a baby shower for my sister Leanne and her little pumpkin on the way!  What better theme for a fall shower!  When I mentioned to my sister what I was planning on doing, she said that she actually calls baby Liam her little pumpkin sometimes. How sweet!


I started out by making the invitations using PicMonkey.   If you haven't checked it out, you should.  It is a wonderful FREE photo editing site.  (I blacked out personal info for privacy.)


We kept everything really simple with pops of orange and yellow and little pumpkins everywhere. It was a beautiful day and we enjoyed the afternoon sun streaming through the windows.


I used washi tape to make the little flags on the caramel apples and also on the pumpkin spice muffins. 


We enjoyed finger sandwiches in the shape of pumpkins. 


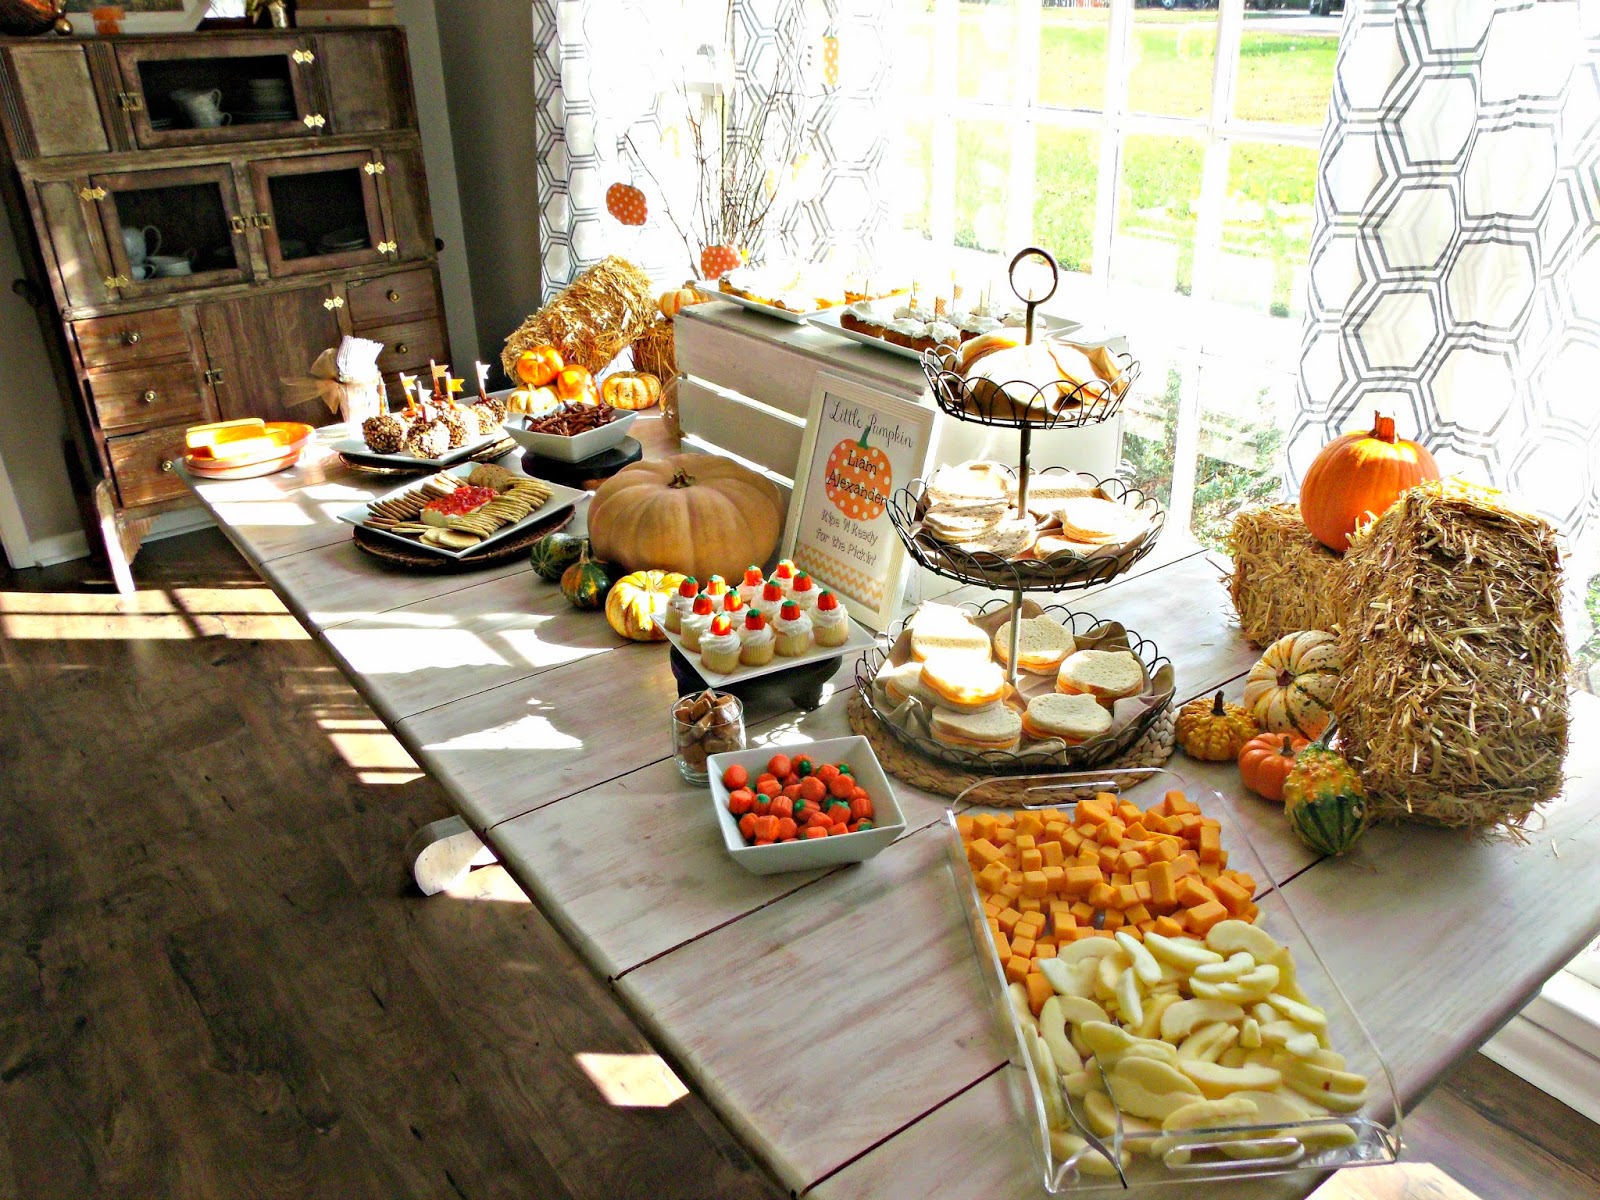
The menu included: Pumpkin Spice Muffins (Weight Watchers recipe) with cream cheese frosting, caramel apples, cream cheese with Harry and David red pepper jelly and crackers,  pretzels, mini vanilla cupcakes, pumpkin shaped finger sandwiches, pumpkin candy, cheese, and apple slices. 


I printed out small pumpkins and hung with baker's twine.


This was printed and framed for the table.  I also made it over on PicMonkey.


Leanne is 36 weeks!


The beautiful diaper cake was made by my sister-in-law, Kayla. Isn't it adorable?  


What a wonderful day for my sister!  Thanks to everyone who came out and celebrated with us. 


Monday, November 04, 2013

November Trend: Plaids

November is here already. It's kind of hard to believe that Thanksgiving is right around the corner. This morning,  I have rounded up some of my favorite plaid posts from around the web.
I am really loving plaid for Thanksgiving this year, and I can't wait to deck out my Thanksgiving table with it!  


Rustic Picnic
Wouldn't you love to be along on this picnic on a beautiful November afternoon?


Casual Outdoor Dining
How about dining outdoors at this rustic-casual table? 


Thanksgiving Tablescape
I love the modern black and white plaid plates used in this Thanksgiving tablescape by Focal Point Styling.


Rustic Thanksgiving Tablescape
The mixed plaids used in this tablescape are beautiful!  Beaux R'eves did an amazing job setting a table that welcomes family.


Thanksgiving Porch
I would absolutely love to snuggle up with a good book on this Thanksgiving porch by Dear Lillie.  It is absolutely gorgeous!  I love the small touches of plaid on the pillows. 


Plaid Nails
Or how about donning plaid on your nails for Thanksgiving?  Beautiful job by Fetching Konad Nails. 


Thanksgiving will be here before we know it.  What are your go-to tablescape or decor faves?  Will plaids make an appearance at your place this year?


Monday, September 30, 2013

Creating a Fall Vignette

Happy Monday everyone!  I hope you all had a splendid weekend.  Today I wanted to share how I create a vignette; the process that I go through when decorating a small, defined space.  And since today is the last day of September, I thought it would be appropriate to do a fall vignette to demonstrate. 


STEP ONE
 *Start with your base layer.  I knew I wanted to use this mirror and layer it with a fall scene tray.  The gourd vase and apothecary jars are also elements I knew I wanted to add.  

STEP TWO
 *Add layers.  The mirror was too stark by itself so I added a burlap ruffle wreath and hung it with some fall tartan fabric that I will be incorporating into my Thanksgiving tablescape.  Just adding that one layer makes it look a lot more polished.

STEP THREE
 *Add details.  Here, I added more vase filler to give it a little more color and hung chalkboard art, a wooden wall plaque with a gold leaf on it, and an acorn plate.  This fills empty space and finishes off the "collected" look I was going for.  


STEP FOUR
*Reevaluate.  After finishing the first three steps, I knew that it still lacked something.  While I did like the apothecary jars, I thought they weren't quite right for this vignette and that it needed something a little more solid.  I removed the jars and added a stack of books and some grapevine spheres and some small pumpkins to give it color. Just looking at the pictures in step three and step four, you can visually see how using something more solid pleases the eye.  Sometimes it is just trial and error when styling a vignette.  Something I do a lot is take a picture of what I am doing and look at it on your camera or computer. That gives fresh perspective and helps you determine what is lacking. 


One more tip:  Repeat colors and decor elements to pull everything together.  The gold was repeated on the leaf plaque, the pumpkin, and the hinges on the pie safe.  The orange was repeated on the tiny pumpkins, lettering on the book, and faintly on the fall scene tray.  Wood was repeated on the grapevine spheres, the branches in the vase , the wall plaque, and the mirror.  It makes for a more cohesive look. 

How is your fall decorating coming along?  


*Last day to order from Yard & Sons with the coupon code!  Take advantage of the offer!


Linking up to:
Metamorphosis Monday at Between Naps on the Porch
The DIY'ers at Home Coming blog
Autumn Abounds Link Party at My Uncommon Slice of Suburbia
Make it Pretty Monday at The Dedicated House
Fall Tablescapes and Vignettes at Centsational Girl

Friday, September 20, 2013

Repurpose: From Shirt to Pretty Patterned Pumpkin


I have this cute houndstooth shirt.  It has blues, oranges, and yellows.  So adorable. I even bought jewelry to match it.  A great statement necklace and a couple of chevron bangle bracelets.  

But I ripped it.  And because of the material it is made of, it can't be repaired.  I didn't want to throw it away and I didn't want to donate a ripped shirt. So I came up with an idea!  

I could cover pumpkins with it!


I have been crushing on turquoise and blue pumpkins.  I thought this fabric paired with turquoise pumpkins would make a nice combination.  

I sprayed my dollar store pumpkins white (the fabric is kind of see-through), covered them with the fabric from the shirt and adhered it with a glue gun. Then hot glued the painted and fabric-adorned pumpkins to a grapevine wreath.  


After cutting circles out of the shirt near the bottom, I still had the sleeves and shoulders intact.  I used it to tie the wreath to the door.  


I added a few sprigs of small birch tree branches that I spray painted gold to give it a little dimension. 


Now, I have to get the rest of my front porch fall decorations finished. Be sure to check back for the full reveal! 

*Linking to the DIY'ers at Homecoming

Wednesday, September 18, 2013

Mixed Metallics Fall Centerpiece.


A couple of weekends ago, I got into the fall decorating state of mind. The hubs and I had a date day and we loaded up on lots of fall goodies.  I had a vision of a neutral centerpiece with mixed metals. I'm talking silver and gold.  


I started with this bunch of pumpkins.  When I began painting and decorating, I had to go back and get at least that many more.  The pumpkins and gourds I bought came from Hobby Lobby, Wal-Mart, and the Dollar Tree.  The oranges and yellows weren't what I had in mind, so I painted them gold, white with metallic overlay, and silver. 


This flea market pumpkin I found was only $4.  I gave it a makeover with Krylon Looking Glass Spray.


Once I got the pumpkins painted,  I gathered up my supplies.  Looking at the pile, I could tell it was the color scheme I was going for; neutral with mixed metallics.

For this project, you will need:
-Old drawers or something you can contain an arrangement in.  If you don't have drawers you could use a large dough bowl, a crate, or some sort of box. 
-Burlap or fabric. 
-Grapevine wreaths or some natural element like dried flowers, vines, branches. Just something you can use as a filler. Cut wood works, too.
-Pumpkins and gourds
-Antlers (optional)


Place your drawers or box in the center of the table.  I tried to make sure mine was centered front to back and left and right. 


Add your fabric elements.  I draped a piece of burlap then added some crocheted doilies for dimension. Haphazard is fine. 


Then add your grapevine, spacing to allow for the pumpkins.  


Next, add your largest pumpkins and gourds.


Then, add the antlers and medium sized pumpkins. It doesn't have to be perfectly symmetrical. The more random the better. It gives it a "gathered" look rather than it being perfect.


Now, add your smallest pumpkins.  Fill in where there are gaps and space the different colored pumpkins apart. 


The last thing to do is to add the feathers.  Add these where there are "holes."

All done!  Step back and admire your beautiful centerpiece!


I am looking forward to enjoying this centerpiece throughout the season and can't wait to see it with place settings for Thanksgiving!  Have you donned your home with beautiful fall decorations yet?


*Linking up to:
Metamorphosis Monday at Between Naps on the Porch
The DIY'ers at Homecoming
Make it Pretty Monday at The Dedicated House
Autumn Abounds at My Uncommon Slice of Suburbia
Fall Tablescapes and Vignettes at Centsational Girl

Follow this blog with bloglovin

Follow on Bloglovin

LinkWithin

Related Posts Plugin for WordPress, Blogger...