Thursday, December 19, 2013

Yummy Strawberry Balls

When I was a little girl, I loved Strawberry Shortcake, the cartoon, and anything that tasted like strawberries.  Knowing that, my Memaw used to make strawberry balls for special occasions and I have always loved them. 

I honestly have never seen anyone else make this recipe. My Memaw is the only person who ever made it when I was growing up.  I even looked on Pinterest to see if I could find it, but I didn't. 

Now that I'm all grown up , I like to make Strawberry Balls for Christmas. And while I was making these delicious bites for neighbors (yes, they are coming, guys) I decided to share the recipe with you. While I don't plan making a habit of sharing sugary sweets on my blog, I thought Christmastime would be a good exception to the rule.  They really are one of my favorite special occasion treats....they are sweet and sour and unlike anything else I've ever tasted. You have to try these!


Strawberry Balls: 

Ingredients:
1 box confectioners sugar
2 cups chopped pecans
2 large boxes and 1 small box of strawberry Jell-O
1 cup of coconut
1 can of Eagle Brand milk


1. Mix sugar, milk, and 2 large boxes of Jell-O together.


2. Then mix in pecans and coconut. 

3. Put in refrigerator until firm.


4. Remove from refrigerator and roll into balls.


5. Then roll the balls into the third box of Jell-O to coat.


My ball-rolling skills seem to be a little lacking, but that won't make them taste anything less than absolutely delicious.


Strawberry Balls Recipe:
1 box confectioners sugar
2 cups chopped pecans
2 large boxes and 1 small box of strawberry Jell-O
1 cup of coconut
1 can of Eagle Brand milk

*Mix sugar, milk, and 2 large boxes of Jell-O together.  Then mix in pecans and coconut.  Put in refrigerator until firm.  Remove from refrigerator and roll into balls. Then roll the balls into the third box of Jell-O to coat. 

Hope you enjoy!

**Be sure to stop by tomorrow for my Holiday Home Tour 2013!


Follow my blog with Bloglovin

Wednesday, December 18, 2013

Weigh-In Wednesday #8

I went to a Zumba class this week for the first time in months.  I had so much fun!  It was Tacky Christmas sock night.  There's nothing like wearing a pair of festive Christmas socks during a high-intensity aerobics class.  I wonder if wearing tacky socks somehow magically made me burn more calories? Hmmmm.


For a long time, when going to aerobics classes, even though I enjoy them immensely, there was always that niggling thought in my head; You are easily the biggest person here. You jiggle too much to be doing this. You look ridiculous!  Well, I do look ridiculous, but this week I came to the realization that I just don't care anymore about those things.  I have to move it to lose it, right?  

Who cares if I am the largest one in the class?  You won't be for long. 

So what if I jiggle like Bill Cosby's Jello?  The more jiggling, the more calories burned. 

Big whoop that I look ridiculous!  All that matters is that you're doing it!

I mentioned last week that I was going to the doctor about my knee.  The good doctor told me my alignment was fine, (no pronated ankles or anything like that). He said I had a common repetitive motion knee injury and that I should wait one month before running again.  I modified my movements at Zumba in order to not re-injure my knee.  My knees didn't bother me the next day, and I was sore in a good way in the right places so that let me know I still was able to get a good workout in.  

And, as of yesterday, I tried a pair of jeans that were a size smaller than what I have been wearing that were hanging unused and lonely in my closet.
They fit! I am officially down a size! Whoop Whoop! And it was time.  My jeans have been falling off of me for a couple weeks now.      

This week's weigh-in:  
I have lost one more pound!  Current weight is 281lbs.  Starting weight was 304lbs.  I've lost a total of 23lbs in 8 weeks. Slow and steady wins the race!

Next Wednesday is Christmas Day, so I will not be doing Weigh-In Wednesday.  I will check back in the following week. I hope you all have an amazing Christmas and a very happy new year!


*Don't forget to like us on Facebook to be entered to win these Christmas goodies.  The drawing is today!  


You can read the first post in my journey to being healthy here. Also contains links to all other Weigh-In Wednesdays.


Tuesday, December 17, 2013

DIY Evergreen Christmas Swags

I luuurve fresh greenery at Christmas time!  It is timeless and classic, and it never goes out of style.  

This year, instead of hanging wreaths on the front of my home, I decided to hang fresh swags. Here's how to make them:


1. Pile your husband's truck high with fresh greenery. 
If you don't have trees in your yard that you can clip, maybe a neighbor or family member does. Ask around.  I have a couple magnolia trees in the back yard but I make a trek to my Memaw's home every year for fresh pine and cedar. My Granny has a huge Magnolia tree, and when I can't get quite enough off of my small trees, I head to her house. 


2. Gather branches together to form swag.
I try to make sure the swag is full and contains varying texture.  Here, I put the pine in the back and added the cedar to the front.  Then, I added a sprig of red berries. 

3. Tie with craft or floral wire. 

4. Add a bow and hang.  
You can't go wrong with classic red.  I used velvet ribbon that I got on sale for 75% off last year after Christmas. 


I am pleased how my holiday swags turned out....simple and classic. 


Monday, December 16, 2013

DIY Waterless Snow Globe

Have you seen all of the adorable waterless snow globes with the cute little bottle brush trees?  I have been crushing on them since last year and I wanted to make my own this year.  


About three or four months ago, I spied this jar at a thrift store for .25.  I had never seen a jar with a flat bottom that was also round on top like a snow globe. I snatched it up knowing exactly what I was going to make with it. I grabbed the bottle brush tree for .97 at Wal-Mart.  I used gold spray that I already had to paint the jar lid, and added Epsom salts as the snow (that we already had on hand as well).  It cost me less than $1.25 to make this craft. That makes me very happy....I'm all about making beautiful things for little money. 


After I finished it, the little dome got a new home in my foyer. It's a small touch, but helps make the room festive, along with the other small touches such as a fresh greenery swag and two small, gold Christmas trees. 


I have also seen these snow globes made from mason jars and lidded glass jars like the ones sugar and flour can be stored in. 

Have you attempted your own snow globe this year?  


Have you "liked" us on Facebook yet?  If not, do so now and be entered to win these holiday goodies.  More details here. 


Thursday, December 12, 2013

Holiday Tour: Sweet Gum Bottom Bed and Breakfast

When Laura Oswald, owner and innkeeper of Sweet Gum Bottom Bed and Breakfast, contacted me about decorating the charming inn for Christmas, I could hardly contain my excitement!  So last week, I got busy decking the halls of the this beautiful, southern getaway.


I wanted to capture the essence of the south at Christmas in keeping with the style of the bed and breakfast.  The plan was to use lots of fresh greenery, namely, pine and magnolia. Sweet Gum Bottom has visitors from all over the country, and what better time of year to show them sweet, southern hospitality than at Christmas time?


Outside, I kept it simple and traditional with fresh greenery and red ribbons.  I think there is such beauty in simplicity. 


The corners of the windows held fresh pine swags to give the garland a little texture. 


Fresh pine was also tucked behind big red bows on the wreaths for added texture here, as well.


Upon entering, a quaint tree greets you.  It holds special ornaments made by children from area schools as well as glass balls that can be signed by guests during their stay.  The piano was topped with fresh magnolia and pine and adorned with jingle bell garland. 


Even the rooms have a little Christmas adornment to make each guests' stay feel festive. 


The dining room is bedecked with fresh pine swags tied with burlap ribbon and beautiful ornaments. 


On the buffet, birch cuttings hold candles and are surrounded by even more fresh greenery.


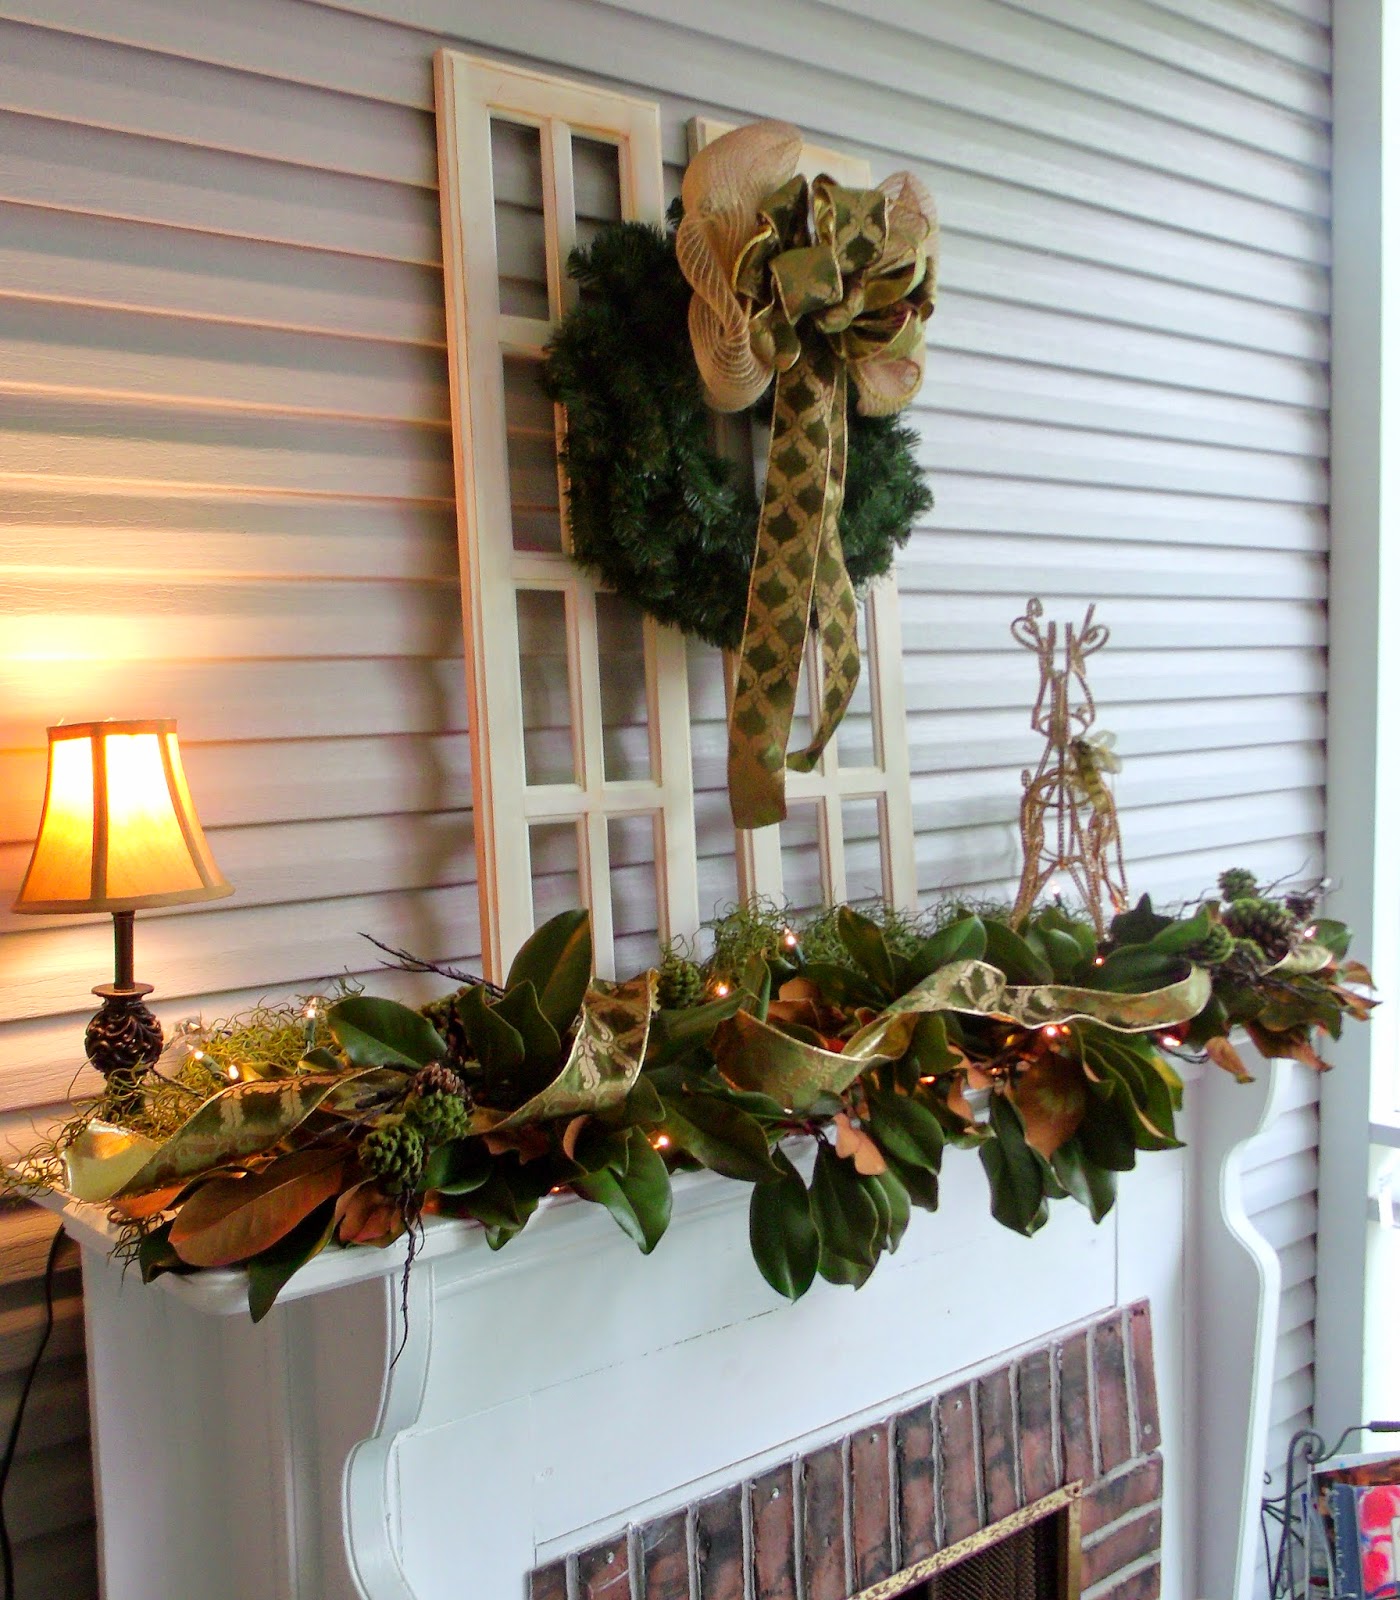
As you walk out onto the covered porch, a fireplace topped with a fresh magnolia garland greets you.  


Can you imagine curling up with a good book and a hot cup of coffee on that day bed swing?  I could stay there all day.  


The Christmas tree boasts green and gold, and is simplistic and beautiful. 


Fresh magnolia was tucked into the cypress Christmas tree to coordinate with the mantle.


I made simple sweet gum ball ornaments because of the inn's namesake, adding a personalized touch to the tree. 


I really do think I could have stayed on that porch all day!  I had such a blast decorating this beautiful, southern bed and breakfast for the holidays!  

To find out more about the award-winning Sweet Gum Bottom Bed and Breakfast, available times to stay, and what all the property has to offer, check out their website here.   They would love to have you stay, and you would leave refreshed with the true southern hospitality experience. 


Follow this blog with bloglovin

Follow on Bloglovin

LinkWithin

Related Posts Plugin for WordPress, Blogger...