Showing posts with label Thrifty. Show all posts

Thursday, May 28, 2015

Thriftastic Thursday: Thrift Shopping Tips and Recent Haul

I love a good thrift store. There is something so satisfying about being able to walk in, spot an item that is unique or unusual, or to be able to find items that you usually buy anyway at a discounted price. Today, I'm sharing a recent thrift store haul (you really never know what you are going to find), and some tips on what to look for while you are browsing flea markets and thrift shops.


Today's Thrift Shopping Tips:
*Look for hardback books to use in vignettes for decorating. Choose books that are in a specific color to go along with your color scheme, or on a particular subject. Also, thrift stores are a great place to score books for summer reading. I always look for hardback classics, too!
*Thrift stores are great places to find unique lamp bases. Painting the base is an easy way to update. Also, don't be afraid to re-wire a lamp. They sell kits at hardware stores like Lowe's and it's an easy process.
*Don't be afraid to paint an item! If it's the perfect shape, go for it!
*A penny saved is a penny earned! Filter the money you save shopping at thrift stores and flea markets into other areas of your budget.

Do you frequent flea markets or thrift stores? What are some of your favorite things to look for when shopping there?

Monday, February 23, 2015

Shop Your Home: Get a New Look For Less


Over the weekend, I finally had had enough! I still had "holes" around my home where I had taken down Christmas decorations and just never put anything else back to replace it. A lot of my year-round décor items had been displaced during the Christmas season and were sitting on the floor of my laundry room, just waiting to be put back where they belong. I also had a lot of items tucked away in closets that had never been used. So, I got this idea that I would lay out my décor items, take stock of what I have. Maybe I could get a new look without spending money.


I began gathering my items, kind of grouping things that were similar by color or material. That way, I could get a visual of what items I had, and it would also help me to see ways to group things and display them in a new way.


By shopping your home, it also gives you the perfect opportunity to clean out and pare down. Really look at what you have. Are there items that no longer reflect your style? Are there items that can be updated and used in different ways? Take the opportunity to donate or sell items that you don't absolutely love. 


If you're at a loss for what to do with some of your décor, I really recommend doing this. It helps a lot to be able to see of the items you have on hand.

Shopping your home helps with:
*Visualizing new display groupings or pairings
*Deciding if items are to be sold or donated
*Showing you what you might still need in your space
*Utilizing items that have previously gone unused

 
Try it!

Wednesday, August 27, 2014

Thrift Store Chair Makeover


Once upon a time there was a girl who loved a good bargain. She searched high and low for great deals on furniture and items for her home. After a long and tiring search, she found the perfect chair at a flea market. Lo, it was only $7! She brought the chair home with her and they lived happily ever after. 

Or at least they have lived happily so far. 


When I spotted this chair a couple of years ago at a local thrift store/flea market, I could not believe the price. It was such a pretty chair if you could look past the faded and dated floral fabric, and the fact that it looked like the previous owner tried to "white wash" the chair using blue paint. It is hard to see in the picture, but it didn't have an even coating of blue paint, just randomly slopped on.  Anywho, it had to come home with me! (The fabric wasn't torn when I bought it. That tear is thanks to regular old wear and tear.)


How I updated the chair:

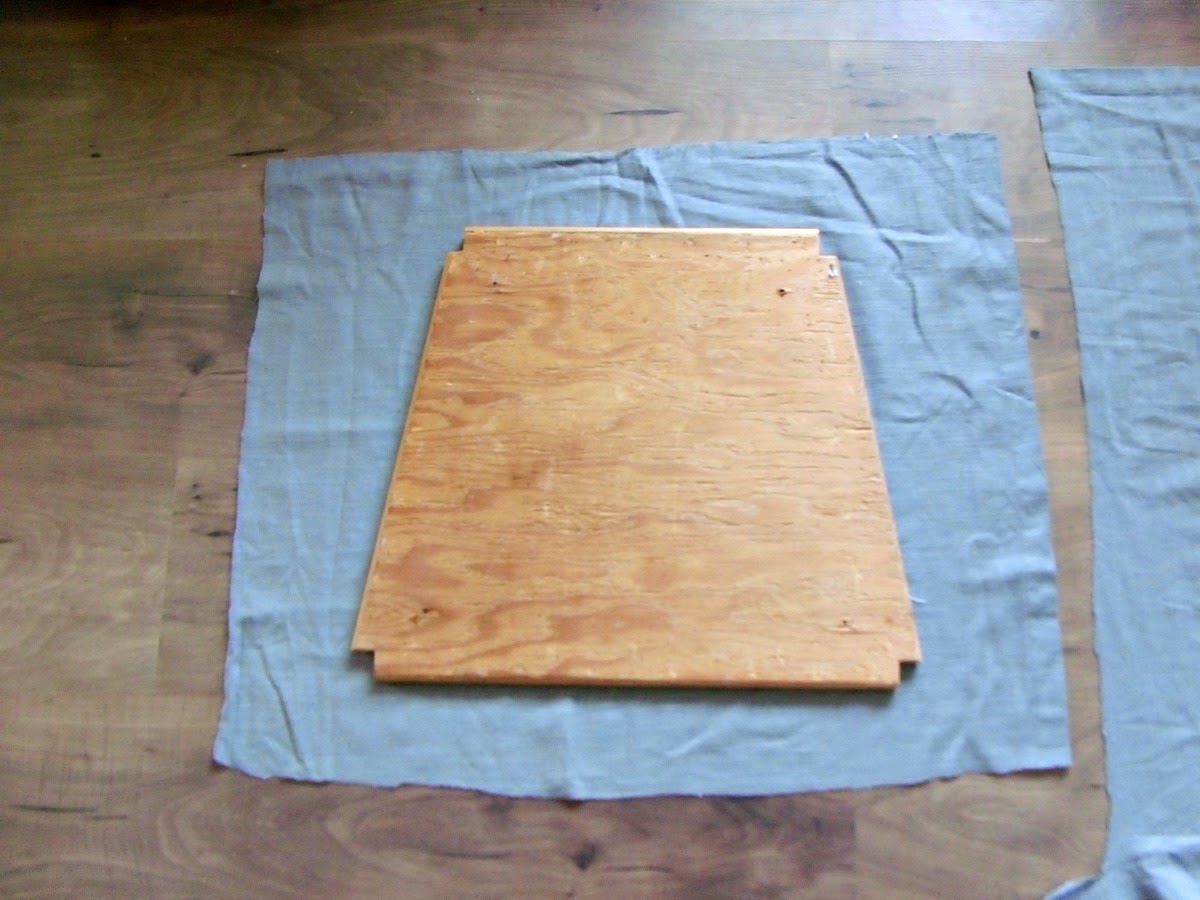
I started by removing the seat and taking off the old fabric that had been stapled on with a bazillion industrial staples. Then I spray painted the chair with Valspar semi-gloss paint and primer in one.  While it was drying I got busy working on the seat.  

I had this cute curtain panel tucked away in a closet, but hadn't used it because it wasn't long enough for my windows. It is a Target panel that I got at Goodwill (still in original packaging) for $6.  I decided that a bird in the hand is worth two in the bush in this instance. It would've cost me more than double that for a yard of upholstery fabric.  I only had to use a small portion of the panel and still have lots left over for more projects. (That cute white design at the bottom of the panel is going to make some really cute throw pillows!)


When covering seat cushions, make sure you leave a good bit of excess fabric on either side of the seat. Once you get your cushion and batting on, it will take up more space than you think. You can always trim excess later.  Oh, and make sure you iron your fabric before you attach it to the seat. 


I chose to go really neutral with this chair because I wanted to have the freedom of moving it from room to room if I need to. That way, it will work well in more than one room. If I had a permanent spot for it, I would've gone much bolder with the seat fabric. 


After the chair was dry, I took a piece of sandpaper and roughed up the edges a bit. I didn't do much. It always drives me crazy to see furniture makeovers where it looks like the sander attacked it with the vengeance of jilted lover.  You've seen them, too. They will have random patches of "wear" in places it wouldn't naturally happen.  I like my pieces to look more natural. 


I usually sand lightly only in places where wear would naturally happen; on the edges of the chair, on curves and sides of the piece. 


The gray and white is super neutral but, like I said, it enables me to move the chair around to different rooms if I need. I can always add a pillow for a pop of color.  I still can't believe that I found this chair for $7. It has such pretty detail in the woodwork. It is one of my favorite flea market pieces.


Have a creative day!
Amanda

Monday, March 17, 2014

Frugal Spring Decor: Shop Your Home


With spring approaching, I was getting a little impatient to see some blooms and spring color in my home. I wanted a new, fresh look, but didn't want to break the bank to get it.  I love my home to look pretty and inviting, but I have to keep budget in mind while bedecking our home seasonally. It just seems frivolous to spend a ton of money on seasonal decor that we can only enjoy for a short period of time each year. 

So, I decided to shop my home and yard and see what I could come up with without spending a single penny.  I wanted to show you that making your home look festive and pretty is attainable on a small budget.  You can do it, too.  You just have to get a little creative. 

I looked around my home and yard to see what I could use to create a fresh look. I used items like bird cages, books, vases, ribbon, and fresh cut blooms. I came up with six spring looks for my foyer without spending anything. 


1. Flower Power

I started by going outside and cutting blooms from one of my Camellia bushes, then snipped some branches from what I think is a Bradford Pear tree.  An old vase, tied with ribbon left over from Christmas, holds the branches, and a milk glass vase holds the Camellias. 


A bird cage sits atop a stack of books on one side, and a smaller bird cage and a bird figurine flanks the vase of pear blooms. 


2. Star Studded

This was a simple swap out.  I traded for the milk glass vase of Camellias for a mirrored star votive holder I got over a year ago at Z Gallerie. I only changed one thing, but it made for a different look. 


3. Middle Height

For this look, I cleared off the dresser and added two stacks of books symmetrically on each side. I put the height in the middle instead of on the side.  The books are topped once again with the bird cage on one side and an antique glass float on the other. 


4. Poetry Rules

Once again here, I put the books with bird cage on one side and the vase with branches on the other.  I added more elements this time; the star votive holder, the bird figurine, and the smaller bird cage all made an appearance along with a framed spring poetry printable in the center. (You can download the free printable here.)


5. Elegant Pairing 

For this look, I took away the bird cages and added the glass float, the milk glass vase, and a convex mirror.  I really love this pairing.  


Isn't it so pretty how the mirror reflects the the flowers?


6. Mirror Mirror

For this last look, I kept it simple.  The framed printable was put away and the convex mirror takes center stage.  I left everything else how it was in the previous look. 


So there you have it. Six spring looks without spending a penny.  

Here's what you need to keep in mind to get a new look for your home:
1.) Fresh cut flowers and branches are an easy way to brighten up a room. Look around your yard.  Look around your neighborhood.  I'm sure friends and neighbors wouldn't mind you getting a snip or two if you just ask.  Add your flowers to any existing vases you have. Freshen the look by tying ribbon around it.  Don't have a vase?  Use an empty tin can. Cover with pretty paper and you've got an inexpensive way to display your blooms. 
2.) Look in all the rooms in your home. Look for things like books with bright, spring colors, framed prints, figurines, or decorative candle holders.  By borrowing from other spaces in your home, you can get your new look without breaking the bank. 
3.) Play with it.  To get the look you want using your existing items may take changing things out a few times before you like it.  Do like I did and see how many looks you can come up with. Then, leave the one you like best. (I left #6.)


Go check these out! Linking up to:

Monday, February 24, 2014

Why I love Target (and Checking In)

Living in my small hometown, it is a treat when I actually get to go to Target.  The nearest one is an hour away, and finding the time to go is tricky.  But, this past Friday, the stars aligned, the sun shone down from Heaven,  and the angels sang......I finally (after weeks of trying to find time) was able to go!  

It was a meant-to-be kind of day.  My girls' school dismissed at lunch, a dear friend had a new baby for us to visit (at a hospital that was on the way to Dothan, where Target is), and we needed to find cleats for softball tryouts. 

So, off to Dothan we went. We found cleats that met the requirements (For me--good price. For Katlyn---they had to have pink on them.) We found a twenty dollar bill in the parking lot of a store (which I turned in in case someone was looking for it.) I treated my girls with a cupcake from Gigi's and found exactly what I was looking for at Hobby Lobby and at Micheal's.  Our very last stop before going home was Target.   

It was a meant-to-be kind of day, I tell you. While browsing the home section, I stumbled across many great deals on things that coordinate well with my home. 


These items came home with me:
*Navy and white pillows $5.08 each
*Teal cable knit pillow $7.48
*Navy and Gray striped body pillow covers $2.98 each
*Black table lamp $5.98

I got 5% off for using my Target RedCard, so the total with tax was $30.63! For 3 pillows, 2 large pillow covers, and a lamp.  I love finding good deals on things that I will actually use.  The pillows are now at home on my couch in my living room, and the lamp is currently in my girls's new shared bedroom.  I also scored a $5 Target gift card for my next purchase from promotions on some of the other items I bought. I love finding quality items at a great price!  

In other random, non-Target-related news, I have been keeping super busy with a couple design projects. Thus, not posting much the last couple of weeks. 
Working on a kitchen design plan.....my ottoman spread with countertop, paint, and hardware samples. 

As a general rule, I try to have my posts lined up ahead of time so that even when I am busy I can post on a regular basis.  After the past couple of weeks I've had, it just caught up with me.  I even missed Weigh-In-Wednesday last week. 

Yucky and sweaty post workout last week.

I am still trucking along with healthy living, working out and eating right.  I have been really frustrated the past couple weeks because the scale hasn't budged much.  But my clothes are fitting looser, so I am losing inches.  I was able to try on a shirt three size smaller this past week and it fit!

I've been thinking a lot about Weigh-In-Wednesdays.  I've been posting  once weekly for a little over three months now, and I really don't want it to get mundane or boring.  I mean, there really is nothing glamorous about trying to lose weight. It's hard work and it takes a really long time.  

So here is what I have decided.  Instead doing Weigh-In-Wednesday weekly, I am going to post it monthly.  Every first Wednesday of the month, I will check in.  That doesn't mean I won't ever post more than that about it.  I just don't want my readers to get bored of the same stuff.  And losing weight is a lot of the same stuff over and over. If I hit a milestone, find a great healthy recipe, or learn some valuable lesson, then I will definitely chime in and share.  But as a general rule, I will share on Weigh-In-Wednesday the first Wednesday of each month. 

I hope you all have a marvelous week!  I have made a little progress in my girls' shared bedroom, so check back for room updates this week!


Monday, December 16, 2013

DIY Waterless Snow Globe

Have you seen all of the adorable waterless snow globes with the cute little bottle brush trees?  I have been crushing on them since last year and I wanted to make my own this year.  


About three or four months ago, I spied this jar at a thrift store for .25.  I had never seen a jar with a flat bottom that was also round on top like a snow globe. I snatched it up knowing exactly what I was going to make with it. I grabbed the bottle brush tree for .97 at Wal-Mart.  I used gold spray that I already had to paint the jar lid, and added Epsom salts as the snow (that we already had on hand as well).  It cost me less than $1.25 to make this craft. That makes me very happy....I'm all about making beautiful things for little money. 


After I finished it, the little dome got a new home in my foyer. It's a small touch, but helps make the room festive, along with the other small touches such as a fresh greenery swag and two small, gold Christmas trees. 


I have also seen these snow globes made from mason jars and lidded glass jars like the ones sugar and flour can be stored in. 

Have you attempted your own snow globe this year?  


Have you "liked" us on Facebook yet?  If not, do so now and be entered to win these holiday goodies.  More details here


Wednesday, September 18, 2013

Mixed Metallics Fall Centerpiece.


A couple of weekends ago, I got into the fall decorating state of mind. The hubs and I had a date day and we loaded up on lots of fall goodies.  I had a vision of a neutral centerpiece with mixed metals. I'm talking silver and gold.  


I started with this bunch of pumpkins.  When I began painting and decorating, I had to go back and get at least that many more.  The pumpkins and gourds I bought came from Hobby Lobby, Wal-Mart, and the Dollar Tree.  The oranges and yellows weren't what I had in mind, so I painted them gold, white with metallic overlay, and silver. 


This flea market pumpkin I found was only $4.  I gave it a makeover with Krylon Looking Glass Spray.


Once I got the pumpkins painted,  I gathered up my supplies.  Looking at the pile, I could tell it was the color scheme I was going for; neutral with mixed metallics.

For this project, you will need:
-Old drawers or something you can contain an arrangement in.  If you don't have drawers you could use a large dough bowl, a crate, or some sort of box. 
-Burlap or fabric. 
-Grapevine wreaths or some natural element like dried flowers, vines, branches. Just something you can use as a filler. Cut wood works, too.
-Pumpkins and gourds
-Antlers (optional)


Place your drawers or box in the center of the table.  I tried to make sure mine was centered front to back and left and right. 


Add your fabric elements.  I draped a piece of burlap then added some crocheted doilies for dimension. Haphazard is fine. 


Then add your grapevine, spacing to allow for the pumpkins.  


Next, add your largest pumpkins and gourds.


Then, add the antlers and medium sized pumpkins. It doesn't have to be perfectly symmetrical. The more random the better. It gives it a "gathered" look rather than it being perfect.


Now, add your smallest pumpkins.  Fill in where there are gaps and space the different colored pumpkins apart. 


The last thing to do is to add the feathers.  Add these where there are "holes."

All done!  Step back and admire your beautiful centerpiece!


I am looking forward to enjoying this centerpiece throughout the season and can't wait to see it with place settings for Thanksgiving!  Have you donned your home with beautiful fall decorations yet?


*Linking up to:
Metamorphosis Monday at Between Naps on the Porch
The DIY'ers at Homecoming
Make it Pretty Monday at The Dedicated House
Autumn Abounds at My Uncommon Slice of Suburbia
Fall Tablescapes and Vignettes at Centsational Girl

Follow this blog with bloglovin

Follow on Bloglovin

LinkWithin

Related Posts Plugin for WordPress, Blogger...